One effective way to strengthen and loosen your hips is by doing targeted exercises with resistance bands. This piece of equipment adds a versatile and portable element to your workout routine, allowing you to target specific muscle groups and improve hip mobility.
Ahead, we’ve got the five best hip exercises with resistance bands to add to your arsenal, plus tips on how to choose the right band for you.
The benefits of hip exercises with bands
There are quite a few benefits of adding resistance bands to your hip exercises:
- Strengthening muscle: Resistance bands create additional tension during exercises, leading to increased muscle activation and strength, particularly in your glutes (butt), hip flexors (front of hips), and abductors (outside of hips).
- Preventing tightness: Regularly performing hip exercises with bands helps to stretch and lengthen the muscles, reducing tightness and improving flexibility.
- Enhancing mobility: By working through a full range of motion, banded exercises improve joint mobility, making everyday movements and athletic activities easier and more efficient.
- Convenience: Resistance bands are lightweight, portable, and can be used anywhere, making them an excellent addition to any fitness routine.
The best hip exercises with bands to add to your arsenal
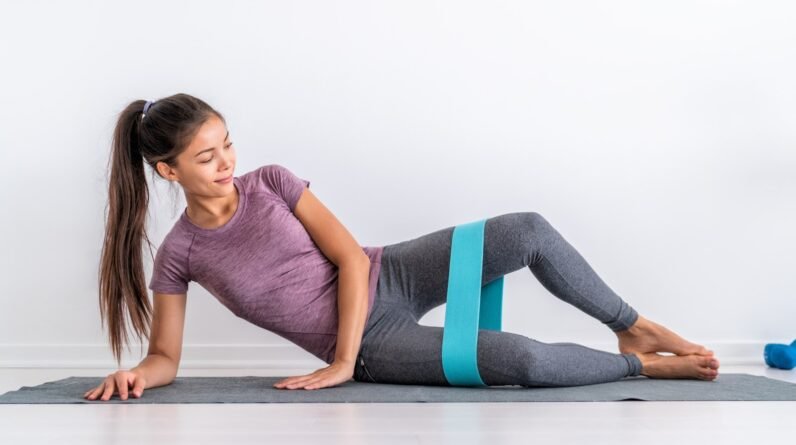
1. Banded clamshell
- Target Muscles: Gluteus medius, gluteus maximus
- Benefits: Strengthens your glutes, improves hip stability, and prevents hip tightness
- Place a mini band or looped resistance band just above your knees.
- Lie on your right side propped up on your right forearm with your knees bent at 90 degrees, stacked on top of each other.
- Keep your feet together and lift your top knee as high as possible without rotating your pelvis.
- Hold for a moment, then lower your knee back to the starting position.
- Repeat for 12 to 15 reps, then switch sides.
2. Banded standing leg lift
- Target Muscles: Gluteus medius, hip abductors
- Benefits: Strengthens the hip abductors, enhances lateral hip stability, and boosts mobility
- Place a mini band or looped resistance band just above your knees.
- Stand with your feet hip- to shoulder-width apart, knees slightly bent, and hands clasped in front of your chest.
- In a slow and controlled manner, lift your right leg out to the right against the resistance of the band until your right foot is about 12 inches off the ground (or as high as comfortable). Keep your left leg slightly bent.
- Hold for a moment at the top, then slowly lower back down.
- Repeat for 12 to 15 reps, then switch sides.
To make this move easier, grab onto a sturdy object or put your hands against a wall for balance.
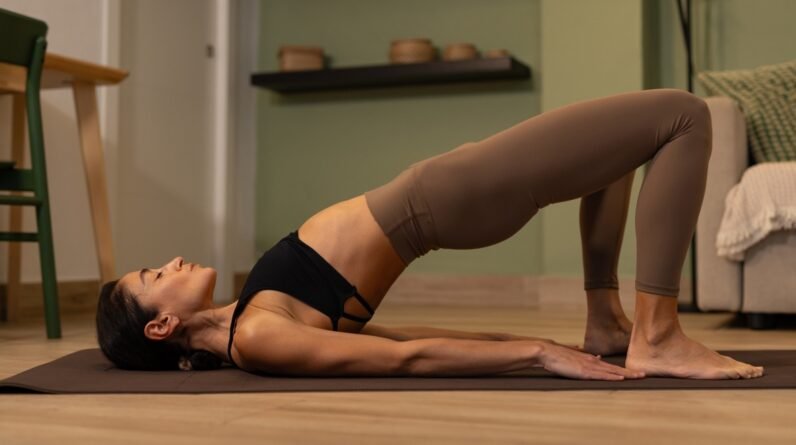
3. Banded glute bridge
- Target Muscles: Gluteus maximus, hamstrings, lower back
- Benefits: Strengthens the glutes and hamstrings, improves hip extension, and prevents lower back tightness
- Place a mini band or looped resistance band just above your knees.
- Lie on your back with your arms down by your sides, your knees bent, and your feet flat on the floor hip-width apart.
- Engaging your core and glutes, lift your hips toward the ceiling until your body forms a straight line from your shoulders to your knees.
- Hold for a moment at the top, then slowly lower back down.
- Repeat for 15 to 20 reps.
4. Banded lateral (monster) walk
- Target Muscles: Gluteus medius, hip abductors
- Benefits: Strengthens the glutes and hip abductors, enhances lateral movement, and boosts hip mobility
- Place a mini band or looped resistance band just above your knees.
- Stand with your feet hip- to shoulder-width apart, knees slightly bent, and hands clasped in front of your chest.
- In a slow and controlled manner, take 10 to 15 steps to the right
- Return to the starting position, then take 10 to 15 steps to the left.
- Repeat for 2 to 3 sets.
5. Banded hip flexor march
- Target Muscles: Hip flexors, lower abs
- Benefits: Strengthens the hip flexors and lower abs, improves hip mobility, and prevents hip tightness
- Place a mini band or looped resistance band around your feet.
- Stand with your feet hip-width apart and your hands on your hips.
- Lift your right knee toward your chest while keeping your left foot on the floor, creating resistance with the band.
- Lower your right leg back down to starting position.
- Lift your left knee toward your chest while keeping your right foot on the floor, creating resistance with the band.
- Continue alternating legs for 12 to 15 reps on each side.
To make this move easier, grab onto a sturdy object or put your hands against a wall for balance.
Tips to incorporate hip exercises with bands into your routine
To maximize the benefits of banded hip exercise, consider the following tips:
- Warm up: Resistance bands are great primers to your lifting days because they can increase the blood flow to your muscles so they’re ready to go once you move on to heavier loads.
- Choose the right resistance band for you: Resistance bands usually come in ascending colors and thicknesses based on the level of resistance they offer. The thinner a band is, the less resistance it has and the easier the exercise will be. On the other hand, the thicker a band is, the more resistance it has and the harder the exercise will be. (The following chart is from Perform Better Bands ($20), so if you’re buying a different set of resistance bands, check the brand’s chart to see if colors and resistance levels vary.)
- Yellow band: Light resistance
- Green band: Medium resistance
- Blue band: Heavy resistance
- Black band: Extra heavy resistance
- Focus on form: Maintain proper form throughout each exercise to prevent injury and ensure maximum effectiveness. If you’re not sure if you’re doing a move right, chat with a personal trainer or film yourself doing the move and compare it to a reputable online video.
- Stay consistent: Incorporate these exercises into your regular fitness routine two to three times per week for best results.


